12 tips for SharePoint Document Libraries
- SharePoint
- Posted by: Hayden Sinclair
- font size decrease font size increase font size
Document Managers love SharePoint. Particularly when migrating from systems like Lotus Notes, Dropbox, Google Docs, or the Corporate File Share.
As an Auckland SharePoint specialist, I have helped migrate a few Document Libraries in my time. Here are some tips for setting up your document libraries in SharePoint.
Create custom Content Types
Custom Content Types are easier to roll up in Content Query Web Parts and are easily used to populate Search Query web parts. With SharePoint moving towards Search as the preferred method of displaying content, assigning custom content types to your libraries helps future proof your installation.
Assign one Content Type per Document Library
When you assign a custom content type to your library, immediately delete the default Document or List content type to avoid confusion.
In my experience users don’t understand the idea that multiple Content Types can reside in the one Document Library. Users do, however, intuitively grasp that different types of content go into different document libraries.
If users need documents with different content types, create two document libraries, rather than training them to use the New > Content Type button.
Store Content Types in your Content Type Hub
In Office 365 the Content Type Hub is a “hidden” Site Collection located at https://yourcompany.sharepoint.com/sites/contentTypeHub/
The largest benefit of utilising the Content Type Hub is ease of management. If all Content Types are stored in your content type hub, you know exactly where to find them when they need to be updated.
Store Site Columns in your Content Type Hub
Again for ease of use, add Site Columns into your Content Type Hub.
Storing all of your Site Columns in the Content Type Hub will also ensure you always reuse Site Columns, rather than recreating them all in each different Site Collection.
Map your Site Columns to Refinable Strings
Mapping Site Columns to Refinable Strings allows you to utilise your columns in Search Refinement Panels and Search Display Templates.
You can group mutually exclusive Site Columns into one Refinable String.
Office365 provides a maximum of 200 RefinableStrings. You may never hit this target. But bear in mind you can stack more than one Site Column into a single Refinable String.
For example, if you have a Finance column (used for Finance Document Libraries only), an HR column (used for HR Document Libraries only), and a Marketing column (for Marketing Document Libraries only) you can map them all to RefinableString01. As a document will never be added into each of these libraries, you can easily use the single Refinable String for each column.
Mapping many columns to one RefinableString allows you to chunk these specialised fields into the one Search Refiners.
Use Folders when uploading, but not when displaying content
When uploading documents to a library, folders can be used to set default metadata values for your items. You can set default values for each folder in Document Library Settings > Column Default Value Settings.
Once items are uploaded you can hide the folders from your views. The Group By function is a better way to display content in views then Folders.
Adjust Versioning before migrating documents.
The default setting for a new Document Library is Create Major Versions. This means that SharePoint will create a major version of your Document every time you update your Metadata Columns. You might therefore get up to Version 6 of your document before you push your library live. This can be confusing for your users.
So before your begin to migrate your documents try setting Versioning to No Versioning. Then once you have added your content and adjusted your metadata turn it back on.
Library Settings > Versioning Settings > No Versioning
Another approach is to turn on Major and Minor (draft) Versions before you start uploading any documents. This approach will start creating items from version 0.1, just remember to Publish a Major version of your document before you go live.
Library Settings > Versioning Settings > Major and Minor (draft) Versions
Insert Quick Parts into your Managed Documents
The Quick Parts feature of Microsoft Word is very useful when publishing Documents.
Document Managers love to include fields like the Document Name, Owner, Approver and Approved Date into the footer of their Documents. Some Document Managers do this manually, but SharePoint allows us to insert these fields dynamically via Word’s Quick Parts feature.
Quick Parts allow you to insert the value of a Document’s SharePoint Column directly into your Word Document. So instead of typing “Jim Jones” into the Document Owner box, you can insert your SharePoint Document Owner field and “Jim Jones” will dynamically populate into your Document.
This is useful, as when Jim Jones leaves the company you just have to update the Document Owner column in SharePoint and your Word Document will update to show your new Owner.
Note: Quick Parts are only available in Word, not Excel, PowerPoint, Visio or PDF’s. Move away from using these file types, if you can, especially if the item can easily be recreated in Word.
Create a label field
System fields (like Version or Created Date) cannot be inserted as quick parts. To get around this Office limitation create a Label to include in your managed documents.
There are two ways to activate labels for your Document Library. The method you choose will depend on whether you are using custom content types or not.
If you have an out of the box document library (i.e. no custom content type)
Go to Library Settings.
- Click Information Management Policy Settings
- Choose Document
- Check the Labels tick box.
- To add version into the label, type {Version} into the Label Format field
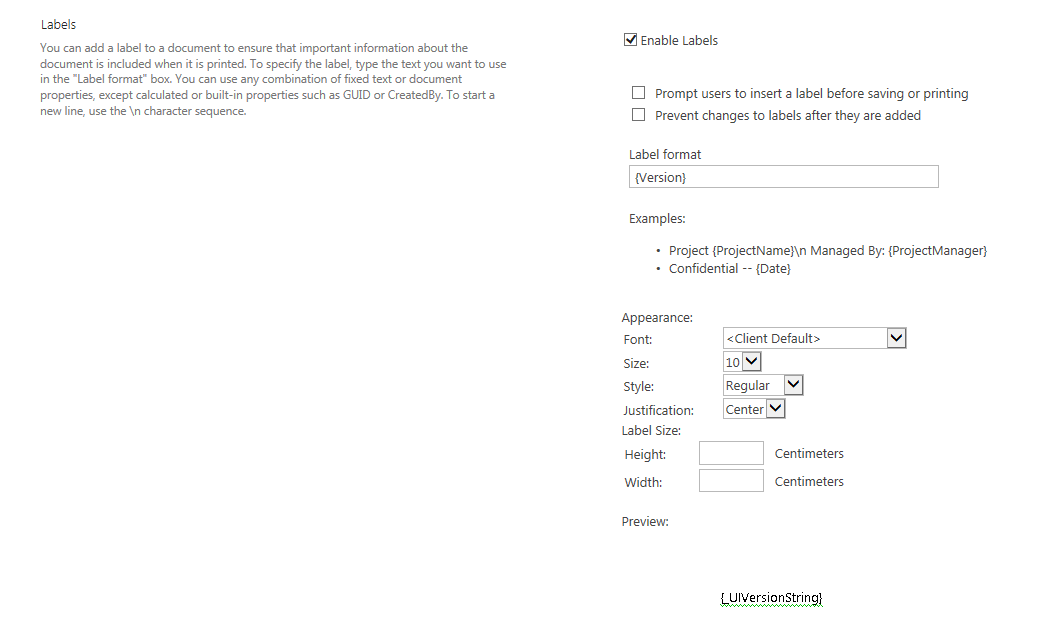
Click OK and this will add a Label column to your Document Library.

You can use this label in your views, but it is most likely to be used as a Quick Part in your Word document.
To insert the Label into your Word Document.
Open Word, Insert > Quick Parts > Document Property > Label.

This will insert {_UIVersionString} into your document. Don’t worry this will be replaced with the version when you save and reopen the file.
If you are using a Custom Content Type
- Go to Library Settings.
- Click on the Content Type name (e.g. HR Documents) under the Content Type section.
- Click Information Management Policy Settings
- Check the Labels tick box.
- To add version into the label, type {Version} into the Label Format field.
- Click OK and this will add a Label column to your Document Library.
Migrate Word Document Content to Wiki Pages
Document Managers usually want to maintain content in Word Documents, but have you ever seen a Word or PDF doc shared on Facebook? Have you ever tried opening a Word or Excel file on your mobile?
The Word Loading tile is the new Blue Screen of Death. You don’t have to force your users to open word to view your content. Embrace the web based nature of SharePoint and try presenting your information on a wiki page!
As Word files are great for printing, editing, and emailing you may have to maintain a word file as well as your wiki page for frequently accessed content. You can add a link to a Word version of your content in the Wiki page.
Encourage Document Managers to Migrate content themselves.
Training has to start somewhere, so why not on day one?
Document managers are in the best position to determine if a document is really needed. It will also give them an appreciation for how much content they really have.