The SharePoint Agency London Office is now open for business

  • Posted by: Hayden Sinclair

After 14 years in New Zealand The SharePoint Agency are pleased to announce we are opening an office in London, England.

Our new website is ready at sharepointagency.uk and the team are ready to start meeting potential new UK based clients.

The office will initially focus on our Client Matters Legal Management PowerApp and our Contracts PowerApp along with our other more generalised SharePoint Offerings.

Read more

InfoPath to be removed from SharePoint Online after July 2026

  • Posted by: Hayden Sinclair

If you have spent years working on InfoPath forms then you will perhaps be saddened to see that Microsoft have announced that InfoPath forms will no longer be supported on SharePoint Online from July 2026.

If you have InfoPath forms on your site we would encourage migrating the processes and data to a new PowerApp.  We would be happy to help you with this transition so feel free to get in touch.

Read more

PnP Modern Search Webparts

  • Posted by: Hayden Sinclair

After going to all the trouble adding metadata to your document libraries and mapping your refinable strings, it would be nice to be able to use these in SharePoint Online.

Out of the box SharePoint Online currently does not offer great options for search customisation.  We have recently built a PowerApp to overcome these obstacles, but in the meantime you can also install the PnP Modern Search Webparts.

The PnP 'Modern Search' solution is a set of SharePoint Online modern Web Parts allowing us to create personalized search based experiences in modern SharePoint pages.

The solution is easy to install and adds a tremendous amount of power to your tenant. 


Read more

Legal Contract Management

  • Posted by: Hayden Sinclair

The SharePoint Agency is looking forward to returning to the Digital Workplace Conference in Christchurch on 27 and 28 February 2024.  

The agenda is wide ranging with loads of interesting topics, there is certainly something for everyone, including a new Power Platform Stream.   

One area we have done a lot of work in is legal and compliance, which is an area many in IT have struggled with.  We’ve partnered with legal automation specialists Lawhawk Limited, and between us have delivered many legal focused solutions.  

Practical Contract Management: Unlocking the Potential of M365 and SharePoint looks at ways we have helped organisations better manage contracts within M365 at much lower cost than the expensive contract management solutions many think are needed.  

You can see more examples in this video: https://lawhawk.wistia.com/medias/hc70d5snvc  

If you’re attending the conference and are from a legal or compliance team, or are interested in use cases and how you could provide better support to your colleagues in legal, come by for a chat and a look at our Contracts PowerApp. We’ll be exhibiting alongside our partners at Flock Consulting.

Read more

Microsoft 365 How to turn off MFA for your organisation

  • Posted by: Hayden Sinclair

In short, you don't want to turn off Multi Factor Authentication for your organisation in Office 365.  If users, or yappy Exec's are complaining about MFA, then you need to address the issue with training. 

But, sometimes you may want to turn off MFA for an Office 365 Tenant or Organisation, mainly if you are using the tenant for a trial, development or training purposes.


If you want to turn off MFA off for your organisation follow these steps.

When you are logged in as a global admin, go to the Azure Portal https://portal.azure.com and choose Microsoft Entra ID.


 Now choose Properties and Manage Security Defaults.


Choose Disable from the Security Defaults drop down list.  

Remember, it is not recommended to turn of MFA. It is almost impossible to get hacked if you have MFA turned on.

As Microsoft state, 99.9% of account compromise could be stopped by using multifactor authentication. Microsoft's security teams see a drop of 80% in compromise rate when security defaults are enabled.  So do this only for test sites.

Read more

Adobe Sign unable to authenticate loop on Power Automate

  • Posted by: Hayden Sinclair

On a recent project we ran into trouble trying to authenticate and create a Power Automate connection for Adobe Sign.  Every time we signed in to authenticate the connection in Power Automate we would be taken to the Adobe User page rather than the Allow Connections page.

I would click Sign In to the Adobe Acrobat Sign connector, it would authenticate, then stay on the Adobe Acrobat page, rather than returning back to Power Automate with an authenticated connection.

I was looking to raise a ticket with the help desk and noticed the Power Automate page in the Group Admin settings of Adobe sign...


You currently do not have access for Power Automate workflows...  Oh dear.


I logged in to the Global Admin account for Adobe Sign and went to Account Settings > Workflow Integration 


I clicked Enable Power Automate Workflows.

Then granted permissions.


Once we had done this for the organisation from the admin account.  Each individual Group Admin user could use Power Automate also.  They just had to log in to Adobe Sign and go to Workflows > Power Automate (mycompany.adobesign.com/account/templates#/powerAutomate)

As my other group admin user I could go to Power Automate and allow the connection from there.


If that fails and you get stuck in a loop again, try this...

I had better luck by going to https://mycompany/adobesign.com/account/templates and then click on Workflows > Power Automate and clicking Create Workflow within Adobe Sign.  This seemed to work better as you were already authenticated and not needing to use a pop up window...  Just create any old flow and delete it later, as all we need to do is create one Adobe connection for Power Automate and use this across multiple flows.


OTHER CONSIDERATIONS

Make sure you allow popups in your browser! 
Try another browser if all else fails. 


Read more

Steco Projects

  • Posted by: Hayden Sinclair

The SharePoint Agency have worked closely with Steco Projects of late to deliver some high quality Project Online projects for a number of New Zealand companies.

Steco has experience with the implementation of Project Online (sometimes known as PWA or Project Web App) together with  the very familiar Project Desktop (Microsoft Project). This includes set up, structuring the portfolios, custom groupings, data synchronisation and coding for reporting across the portfolio, both from Project Online and also very effectively from Power BI reporting, using direct data from the Microsoft Project dataset.

Steco's Warwick Stevenson is one of the top Project Management consultants in New Zealand, and is worth talking to if you are contemplating a Project Online implementation. 

Read more

Visit us at The Digital Workplace Conference 2023

  • Posted by: Hayden Sinclair

The SharePoint Agency have been attending The Digital Workplace Conference (DWC) New Zealand for many years now and this year we are pleased to be one of the exhibitors at the event.


Presentation: Wednesday at 3:45 pm - 4:30 pm

Hayden Sinclair, our Power Platform specialist, and CEO will be presenting a session on Creating Gigantic, Dynamic and Offline PowerApps with a SharePoint datasource

We have found when creating PowerApps with SharePoint as the backed you can hit limitations. Here are a few of the creative methods we have used over the years to get around these limitations and to expand the lifecycle of your SharePoint based PowerApps.


Chit Chat

You can also book a chit chat with Hayden Sinclair, to discuss any topic you want, one on one.


Meetup

We are also hosting an informal Meetup for the SharePoint/Microsoft365 Meetup - Auckland NZ at our exhibition stand on the Wednesday morning.

We can get together at the SharePoint Agency booth in the Exhibitors hall and meet each other in person. Undoubtedly we will bump into each other throughout the conference, but it would be good to meet up in person after so many online sessions.

There is a great team of speakers at the conference this year, and as usual the conference is a great way to catch up with fellow Office 365 / PowerApps and SharePoint users and see real world examples of the Power Platform in action.

We are looking forward to both presenting and attending. We will see you there!


PowerApps Club

We have recently launched The PowerApps Club and will be demonstrating the apps at our exhibition booth. 


Why attend DWC New Zealand?

  • 25 professional speakers and four workshops
  • enhance your digital transformation and leadership skills
  • embrace new ways of working and how hybrid working impacts work-life integration
  • explore how you can personally survive and succeed in the digital workplace
  • extend your knowledge and get updated with everything new in Microsoft 365
  • learn from customer stories, panel discussions, and one-on-one connections
  • see examples highlighting the capability of Microsoft 365 apps
  • participate in demonstrations of customer innovations and new ways of working
  • review third-party tools to extend your implementations in the Exhibition Area
  • network, make new acquaintances, and create opportunities.

Tickets

You can buy tickets at www.dwcnz.co.nz for all the latest updates. .

Event details:

Digital Workplace Conference New Zealand

Date: Wednesday, March 1 to Thursday, March 2, 2023

Location: Pullman Auckland Hotel & Apartments, Auckland, New Zealand

Visit www.dwcnz.co.nz for all the latest updates.


Read more

The PowerApps Club

  • Posted by: Hayden Sinclair

Over the years The SharePoint Agency have had many requests to purchase our custom Power Apps that are listed on PowerApps.co.nz . It can be difficult to price an app we have spent many hundreds of hours developing. With this in mind we are pleased to announce the launch of the Power Apps Club..

The Power Apps Club.will provide members with access to The SharePoint Agency's custom PowerApps on a yearly subscription basis. Members can download each Power Apps Solution and install them on their own Microsoft 365 environments.

We have many great Power Apps available including our Inspections PowerApp and a Surveys PowerApp, a simple TimeSheets PowerApp and an Outlook web add in that allows users to Save an email from outlook to SharePoint.

It is our intention to release many more apps over the coming months. Members will be encouraged to check back regularly and download the newest apps as they become available.

Register Online to join the Power Apps Club.

Read more

Book a one off support session

  • Posted by: Hayden Sinclair

Having trouble with SharePoint / PowerApps or Power Automate?

Book in a Support Session.


Join us for a personalized SharePoint experience with our One-on-One Support Session! Get tailored solutions and expert guidance to optimize your SharePoint / Power Apps / Power Automate apps and help unlock your organisation's full potential.

With dedicated support, we may be able to resolve some of the Office 365 challenges you are currently facing.

Book in a Support Session now and take advantage of this unique opportunity to advance your SharePoint, Power Apps and Power Automate knowledge!

Read more

Accommodation in Clyde, Central Otago

  • Posted by: Hayden Sinclair

We had a great holiday in Clyde recently and we wanted to plug the lodge where we stayed. Be sure to book your Accommodation in Clyde at
45 Sunderland Street Clyde.

The perfect place to base yourself on your Central Otago adventure, 45 Sunderland Street Clyde offers boutique accommodation within the walls of this historic 150 year old stone cottage.

The home has been lovingly restored and renovated, and features 4 bedrooms, 2 lounges, two sunrooms, a private country garden and a spa pool and a cat.

Located within five minutes walk of all five of Clyde's cafe's and bars and 1 minute away from Oliver's Restaurant and Bar, 45 Sunderland Street is perfectly located so you can fully explore the historic village of Clyde , in Central Otago.

Read more

Installing SharePoint Lookbook templates on your SharePoint Online Tenant

  • Posted by: Hayden Sinclair

Updating the look and feel of SharePoint has always been challenging.   Before Microsoft launched the modern SharePoint pages on SharePoint Online you had to modify the Master Page of the site itself to get away from the standard SharePoint look.  Over time this became problematic, as Microsoft continue to update the code within SharePoint Online.  You could suddenly find that elements of the page would no longer work due to a recent code update.

Third party providers moved to produce SAAS products to provide a nicer looking SharePoint experience for customers.  These companies produced a template that looked better than Microsoft’s classic pages.   These services have now been superseded by SharePoint Online’s Modern look and feel.  We did a project late last year, for example, where we removed Kaboodle from an organisation and migrated the content to Microsoft’s modern web pages.  This saved the company their monthly licensing fees and not a single user complained about the change.

I have seen most organisations in the market move away from making changes to the master page layouts themselves. In fact I would refuse to do a project like this now, it's just not money well spent for the client.  I find clients typically save their money and happily work within the constructs of the look and feel of the Modern Pages. 

If clients want to change the look and feel of their site I start them off with the SharePoint Lookbook.   https://lookbook.microsoft.com/

The Lookbook is a collection of pre-built SharePoint templates that can be installed in your own environment.  You can easily add them to your site and make customisations from there.  Changing the logo is really easy, and we can run PowerShell scripts to change out the colours to exactly match your brand guidelines.   

In a few hours you could have a great looking site ready to go live.  This really was something I would expect to take weeks using the old master page method as Stig points out on the Lookbook website.  


I recommend trying Lookbook in the first instance, as you can quickly get an idea of how the site will look and feel without spending anything.  Once you add your new corporate photos onto the site and update with your colours, you will be surprised at how good the site looks without a expending great deal of effort AND you can be sure the site won’t break in the future, as you are using “out of the box” SharePoint functionality.


To install a Lookbook template, find a template you like the look of.  For example The Perspective SharePoint look book - The Perspective (microsoft.com)


Then click on Add to your tenant


Complete your details and click Provision.  It takes about five minutes to load on to your site, and then you can edit and update as you wish - without any ongoing license fees

Read more

How Transworld are transforming their business brokerage processes

  • Posted by: Hayden Sinclair


The SharePoint Agency have been luck to work with Lawhawk on a few recent projects including this great project for Transworld Business Advisers.  This case study outlines some of the highlights of the project.


Established in 1979, Transworld Business Advisors was originally founded in South Florida, and grew quickly to become one of the largest business brokerage firms in the world. In 2019 it was launched in New Zealand by David Newport. A business broker for 25 years, David wanted to build something larger than the boutique business he had been running. Merging the strategies of Transworld's big business with local companies created a different mix for the New Zealand brokerage market. The New Zealand branch operates out of Auckland and Queenstown. Transworld NZ provides business brokerage services when owners are selling their business, as well as helping to set up franchises, helping buyers to buy businesses, and help businesses to expand into offshore markets.

David Newport Quote 1

A focus on making processes easier and more transparent while maintaining compliance

The Real Estate Agents (REA) Act 2008 is one of the main challenges business brokers face in terms of compliance. "It's aimed at real estate, but we're under the same Act," David explains. "And there are a number of challenges when it comes to creating a national company under the Act, especially from the points of view of supervision, documentation and compliance." It was with this in mind that David began looking into an automated, online documentation solution that would allow him to supervise a number of brokers nationwide to ensure compliance. "What we needed was a system where the important documentation could be completed," he explains. "Something where I could check it, and then it could be securely and digitally signed, returned and stored."

Transparency was also a requirement, with everything being tracked and recorded. "We needed records of all the interactions and date stamps, in case we ever needed to resolve a conflict."

To remain compliant with the REA Act, David also needed something that would enable them to demonstrate that they provided supervision for their brokers. "We needed to show that the documentation was correct before it went to them, and that it was sent to all parties that were required to see it," he explains. "Then we could show that it was signed off by all parties before going to market."

As someone who likes to harness technology as a means of streamlining processes, ensuring accuracy and time saving, David had confidence there would be a solution to meet his requirements. "I've always been focused on making processes easier," he explains. "I knew there had to be technology that could handle this kind of documentation."

David Newport Quote 2

Going 95% paperless: a solution for moving business brokers into the digital era

David's search for that technology did not take long. "I was introduced to LawHawk by my lawyers at Goodwin Turner," David recalls. “Because they’re specialists in franchise law, they not only helped us to draft great legal documents, but they also understood the challenges and opportunities in building a truly scalable business and how automation and their relationship with LawHawk could help.”

LawHawk Managing Director Gene Turner saw the opportunity to apply their skills in a business broking context. "I could quickly see the potential, so I was keen to work with David," Gene recalls. "I could see how it would enable him to scale his business both through adding more franchisees, and more brokers, with legal compliance and good business practices built into the solution at every step."

There was also potential for David to create a competitive advantage. "We've got a system that makes the workflow of a business broker easier and more efficient," he explains. "It means that they can go about 95% paperless. That means more time talking to buyers and sellers, and less time chasing paper."

LawHawk has developed automated documents and agreements that include:

An initial appraisal document

Brokers can complete this very quickly, providing a high-quality proposal to a prospective customer. It sets out what their business could be worth and why Transworld are the people to sell it.

A seller listing agreement written by Goodwin Turner

This covers all their major risks, which all the relevant parties (directors, shareholders, trustees etc) can sign digitally from wherever they are. Every party that is entered automatically gets a signing block in the document that is recognised by the digital signing system, so there is no risk of missing anyone or any need to manually set up the signing. "One of our customers recently mentioned how impressed he was with the form of contract he received," David recalls. "He's quite keen on learning how we did it."

An agreement for Transworld to act for prospective buyers of businesses

Similar to the seller listing agreement, this agreement sets out how Transworld will work with its customers to find and acquire suitable businesses.

An online information form

The customer uses this to provide all the information Transworld needs to be able to list the business. They can go in and out of the form as often as needed until it is complete, and upload all required attachments. Transworld can see the status of it at all times but also get on with things more efficiently, as it helps reduce delays.

An online risk assessment form

This is required for each transaction, to prevent money laundering.

A thousand-fold benefits - LawHawk integrates with SharePoint

The LawHawk solution has meant increased flexibility for Transworld brokers, as it can be used on any internet-connected device.

"The benefits have been a thousand-fold," says David. "From our position, the brokers' position, and the clients' position, the nature of the whole process has significantly improved. Business owners can put all the required information into one platform, and their accountants can add information as well, which eliminates double-handling. It's a huge time saver."

"It also enables us to prove that we asked the required questions," David says. "And that the owner certified that the answers to those questions were correct. That's a great protection for us."

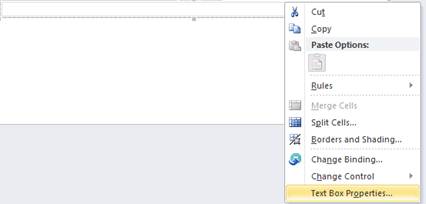
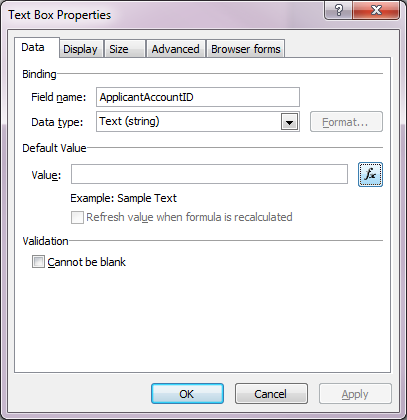
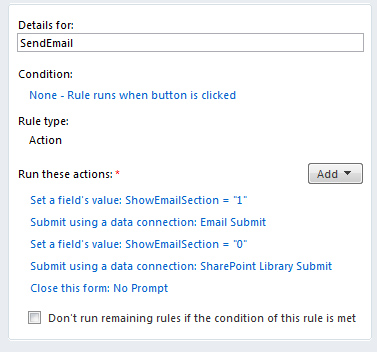
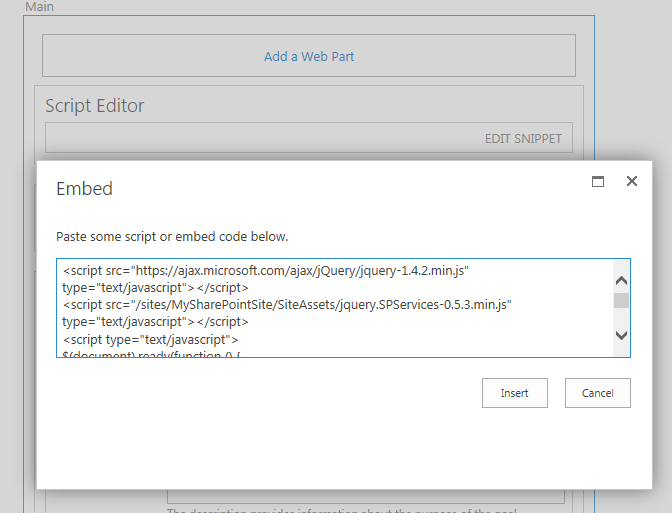
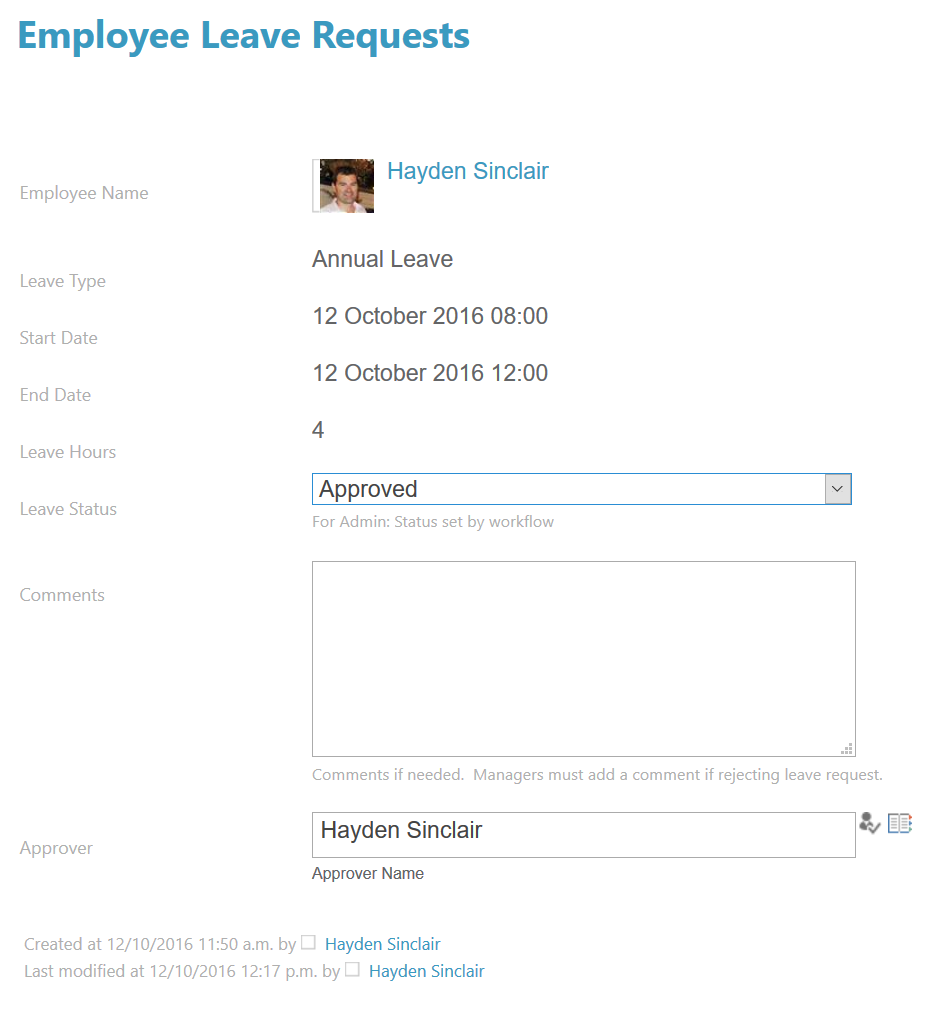
When LawHawk initially worked with Transworld to design the concept of the online forms, automated documents and digital signing, they realised there was a missing component - a system for Transworld and its brokers to work out of, and to efficiently collaborate with each other and their customers. "I suggested David move to Office 365 and introduced them to The SharePoint Agency," Gene explains. "Everything is now managed through SharePoint. They can find the online forms needed to generate the documents. There’s workflow that sends broker-submitted forms to David for review and approval, and everything can be saved and managed in SharePoint. Documents are sent for signing from SharePoint and returned automatically."  Through our relationship with The SharePoint Agency, we were easily able to design and build the overall solution.

Transworld can easily add new SharePoint sites for different brokers and/or transactions. "The SharePoint Agency has effectively created an intranet for us," says David. "One that also has fully operational document flow. All our manuals, communications, training documentation, applications and transactions are in one place."

The solution has also been highly cost-effective. "Office 365 licenses is our only variable cost with the system as it stands," David explains. "It doesn't matter if we have one broker or 30, and we can easily extend it to franchisees too. That's an amazing scenario when you think about it”.  David adds, “While the solution has been customised to our particular circumstances, the same approach – and benefits – could apply to many types of franchise businesses.”

Looking ahead

David sees the relationship with LawHawk as on-going, not only because of the efficiency gains, but for future scaling of the business. "At the moment we're at about 85% of our capabilities from a documentation point of view," he explains. "There are a couple of other things we'd like to develop. We need to work with what we have now for the next six months, so we can get a feel for what the next steps are. It's an on-going, continually improving process. It's perfect for us right now with what we know, but as we add more brokers and franchisees, we're going to come up with ways to build on it."

David also notes LawHawk's support when issues crop up, or when David has an idea he wants to discuss. "Gene has a real passion for this," he says. "He's open to ideas and LawHawk has been very responsive and great to work with, helping turn my big ideas into reality."

Read more

SharePoint Spaces now live

  • Posted by: Hayden Sinclair

SharePoint Spaces has recently gone live.   


SharePoint Spaces allows you to create Virtual Reality headset ready SharePoint pages so you can create and share, secure and extensible mixed reality experiences. They work really well with 3d objects and models and still operate without a VR headset.


To enable SharePoint spaces on your SharePoint Online site, go to Site Settings > Site Features and activate Spaces (Preview).


Go back to your home page and click New > Space and start editing. 


Read more

Join us for our SharePoint Tuesday meetup group

  • Posted by: Hayden Sinclair

We are having a SharePoint Tuesday meetup  for the first time in 2020 in the inner city. Come along for a morning coffee with your fellow SharePoint people in Auckland City.

The date is March 10 2020 and all are welcome. We will start at 7.30am.
The meeting usually goes for about an hour before everyone has to head off.

I am excited about these new search parts for Modern Pages.
https://microsoft-search.github.io/pnp-modern-search/ Finally we can add our own filters to modern site pages.

We should be easy to find, but if you get stuck call or text Hayden on 02108203650.

Read more

Join us for Techy Tuesday - 25/02/2020

  • Posted by: Hayden Sinclair
Join Hayden Sinclair from The SharePoint Agency and Gene Turner from Lawhawk as they demo the key functionality of Office 365 to help you understand where to go from here.

About this Event

So you purchased Office 365 (or want to) but, do you know what to do with it? Are you familiar with its features – you know, the ones to help you be more effective and efficient? If you haven’t had the time to work all of this out, no problem, come along to this Legal Techy Tuesday session and get the highlights sitting at your desk in just one hour!

In this FREE webinar, Office 365 and SharePoint consultant Hayden Sinclair from The SharePoint Agency and Gene Turner from LawHawk will look at some of the key functionality you already have but more, help you to understand where and how you can use it in your firm/organisation!

Here’s what they’ll focus on:

• How to collaborate online in Word, Excel and PowerPoint and see each other’s work in real time

• How to use Office 365 Planner as a project management tool to create plans, organise and assign tasks, share files, set due dates and provide status updates

• How to use SharePoint as your document management and collaboration tool

• How to chat with co-workers in Office apps

• How to use Microsoft “PowerApps”, “Power Automate” and “Power BI” for things like employee on-boarding

• How to create self-serve NDAs, embed it into your legal team SharePoint page, and let the business get on with things while still keeping an eye on them

• How to id and access the wide range of out of the box integrations available with Office 365, including AI through Azure Cognitive Services (the tech development tool for those who are not tech gurus).

And, they’ll answer all your questions too!

If you can’t make it to the live webinar (or even if you can), you will be able to catch the re-run (as many times as you like) when we post it on the CLI-collaborate (CLIC) free resource hub – there’s an amazing library of practical and helpful videos waiting for you there right now!

You can sign up here...
https://www.eventbrite.com.au/e/legal-techy-tuesday-series-office-365-for-lawyers-virtual-demo-tickets-85737975593

Read more

Microsoft launch HoloLens2 augmented reality headset

  • Posted by:

Microsoft's new HoloLens 2 augmented reality headset released

Microsoft have made their HoloLens 2 Augmented Reality (AR) headset available to buy. The SharePoint Agency team are excited to get their hands on it and discover the potential benefits this technology could offer our clients.

The HoloLens 2 features eye tracking, hand tracking, and is lightweight, compact (fits over glasses) and a large field of view.

The SharePoint Agency team envisage HoloLens 2 and AR in general offering numerous exciting application for enterprise and can't wait to experiments and discover the possibilities. 

Read more

Building Performant PowerApps

  • Posted by: Hayden Sinclair

The master class on building performant apps presentation from Mehdi Slaoui Andaloussi, was one of the highlights of the recent Microsoft Business Applications Summit.  Here are some of my notes from the session.

When you load your data is important.

Do not load collections on App Start.  Adding collections on the OnVisible of the first screen will make the first screen display faster and the app will appear to load quicker. 


Preloaders help the user feel the app is working correctly.

Use a preloader, so users can see that data is indeed loading.  This will ensure they don't have to 'panic' and hit the refresh button just in case. 


Don’t load your data all at once

Only load the data you absolutely need in your preloading session.  If you don’t need to load the data immediately, then load this outside of the preloader.  This will make the app appear to load faster.


Create Local Collections

If possible, use Local Collections for data to save on network calls.  Local collections load really fast!  If your data will not change during the use of the app (conference session times, locations, speakers, product names, office locations etc) then you can pull the content into a local collection when you start your app rather than making lots of network calls to the outside data source throughout your app.


Concurrent

User the Concurrent() function.   Concurrent allows data sources to be loaded in parallel rather than sequentially.  This will speed up the load time of you data.

The Concurrent function evaluates multiple formulas at the same time. Normally, multiple formulas are evaluated by chaining them together with the ; operator, which evaluates each sequentially in order. When the app performs operations concurrently, users wait less for the same result.


App Assets

Make sure your app assets (images, logos etc) are web optimized.   Making your images and logos are as small as possible will improve load times on the app.


Read more

Microsoft Business Applications Summit PowerApps Sessions

  • Posted by: Hayden Sinclair

The Microsoft Business Applications Summit was recently held in Atlanta.  The breadth of content delivered over the week is remarkable.  There were fifty PowerApps sessions alone.

For those who couldn't make it to the event, Microsoft have kindly made the videos from the session available online.

I can highly recommend the session on the new PowerApps AI Builder, and this quick intro on how to build a Powerapps Model Drive App was really useful as well.

The sessions are also available in this PowerApp.

Read more

The SharePoint Agency accepted as Microsoft PowerApps Partner

  • Posted by: Hayden Sinclair

We are pleased to announce The SharePoint Agency has been listed on Microsoft's PowerApps Partner Directory.  

Most of work tends to be in the PowerApps space at present, so it is great to be listed with other New Zealand Partners on the Microsoft site.   More details about our Partner Showcase app coming soon.

Read more

Managed Metadata Explained

  • Posted by: Hayden Sinclair

This video from Sean Bodner provides a good summary on the differences between Taxonomy, Managed Metadata and Folksonomy (or Enterprise Keywords).

Read more

Promoting People Picker fields

  • Posted by: Hayden Sinclair

Promoting the People Picker field does not work as immediately expected within SharePoint.   When you promote the Account ID or Display Name field the resulting SharePoint column is typically left blank.

The easiest way to promote the username is to create a new Account ID (or Display Name) field in your InfoPath form and then populate this field from the People Picker.   You can then promote this field from InfoPath.


1. Add a Text Box field under your People Picker field (you will delete this field from your page later).

2. Label this field as ApplicantAccountID


3. As you can only apply formatting rules to the people picker field, you will not be able to create a rule to update your ApplicantAccountID field.  You can however set the default value for your ApplicantAccountID field to the Account ID of your people picker field.

4. Select Text Box Properties.


5. Click the FX button in the Default Value > Value field.


6. Select Insert Field or Group


7. Choose either AccountId or Display Name.  If you wish to use this field to email users via a workflow then promote the AccountID field.   

8. Click OK

9. Click OK

10. Click OK

11. Remember to delete the new field from your page view


12. To promote your new field select Form Options > Property Promotion > Add


13. Click OK

14. Click OK

15. Now you can publish your form and use your newly promoted field.

Read more

Access user Active Directory details via the User Profile Service in an InfoPath form.

  • Posted by: Hayden Sinclair

Forms should make life easy for users. Anything you can do to help the user complete the form faster will improve the usability and acceptance of your project.

Users expect that they should not have to fill in their name, email address or phone number to the form, if that information is already stored in Active Directory. We can easily get these details by accessing the User Profile Service via a Data Connection in InfoPath.

Here’s how to access the User Profile Service in an on-premise hosted SharePoint environment.

Note: If you are using Office365 or Microsoft's SharePoint Online you are out of luck when it comes to this one!   This feature has been disabled by Microsoft as a security precaution.  

Click on Data Connections


Select Add


Choose Receive Data


Select SOAP Web Service


Paste In your URL to your site home page and append _vti_bin/UserProfileService.asmx?WSDL


Choose GetUserProfileByName


Click Next.


Click Next


Click Finish

Job Done.

Read more

Sending email from InfoPath, closing the form, and avoiding "The form has been closed" message

  • Posted by: Hayden Sinclair

Recently I worked on a form for the Logistics Team.  The manager wanted an email sent every time an order passed the “Waiting for Allocation” status.

Typically I piggy back on a SharePoint Designer workflow to send my form emails.  You have complete control over the content of SharePoint Designer generated emails and that is usually the most important requirement.

The manager was not too worried about the content of the email, in this instance, and there was no other reason to create a workflow, so I opted for the Submit to Email method within InfoPath itself.

When using the Submit to Email method you can either Send only the active view of the form and no attachment or Send the form as an attachment.


Send the form as an attachment requires InfoPath form filler to be installed on each user’s computer, which I could not guarantee.  A more important reason to avoid this method is that I would break the user-convention I want to establish with the site.  Allowing users to interact with the form sometimes on the intranet  and sometimes in their inbox will lead to doubt and confusion in user’s minds.  

Nothing affects user-adoption in the early stages of a project more than doubt and confusion.

Send only the active view of the form and no attachment was the only option.   

Easy I thought.  I will set up an Email View with the six required fields, switch views, send email, close form.  Job Done.  

On the Submit button

  1. I added a switch view rule to go to the Email View
  2. sent the email
  3. switched back to the current view
  4. closed the form.


Everything worked except for the Close This Form rule.  The form would display the “The form has been closed” message without closing the form, and returning the user to the Document Library.

After a short investigation I felt this was most likely a bug in InfoPath. Rather than troubleshoot the bug I decided to change tack. 

I created a new EmailSection with my required fields.  I created a ShowEmailSection field to control when the EmailSection was visible, and added formatting rules to all of my sections displaying or hiding them after the Submit button was pressed.

I updated my Submit button rules.  

  1. I changed the value of the ShowEmailSection field (this triggered the formatting rules displaying the EmailSection and hiding my other sections)
  2. Sent the email
  3. Switched the ShowEmailSection field back to default
  4. Closed the form.

My Submit Button Rules


This method sent my ShowEmailSection fields in the email, and closed the form without showing the The form has been closed message.

Job done!

Read more

Future of InfoPath - 2015

  • Posted by: Hayden Sinclair

It seems InfoPath is around for a while yet.


Microsoft were hoping to retire InfoPath in the near future, but this decision has been rescinded.  Here is an excerpt from their updated blog post.


“As part of the update shared around the Evolution of SharePoint and the next SharePoint Server on-premises release, we are also updating the timelines for removal of InfoPath Forms Services components of SharePoint and SharePoint Online. Specifically, InfoPath Forms Services will be included in the next on-premises release of SharePoint Server 2016, as well as being fully supported in Office 365 until further notice. Customers will be able to confidently migrate to SharePoint Server 2016 knowing that their InfoPath forms will continue to work in their on-premises environments, as well as in Office 365.

The InfoPath 2013 application remains the last version to be released and will work with SharePoint Server 2016.”


There are also rumours of a Migration Tool, though nothing formal has been announced from Microsoft.   InfoPath will be formally supported until 2023 for on-premise installations, which is plenty of time to plan for any migrations. 


Read more

Enhanced Quick Edit for SharePoint lists and libraries

  • Posted by:

Enhanced Quick Edit for SharePoint lists and libraries

Applying the power and simplicity of "spreadsheet" views to modern SharePoint lists and libraries. 

We're excited to learn about the recently released enhanced capabilities of Quick Edit in SharePoint lists and libraries. This functionality will provide users more options for displaying and filtering data in Quick Edit mode. Some of the features are outlined below.

Use the interactive walkthrough below to test drive the new capabilities of Quick Edit.


Access filters pane from Quick Edit mode 

Content can be filtered in Quick Edit mode to quickly find specific items to be updated. Also, filters or sorting applied in Quick Edit will be retained when the user navigates back to the normal view.  

SharePoint list showing quick edit filters
Filtering in Quick Edit


Custom formatting displays in Quick Edit 

Any custom formatting applied to the list or document library will now be visible when in Quick Edit mode. For example cell/column/row highlighting, data bars and conditional formatting.


SharePoint list showing quick edit formatting
Formatting in Quick Edit


Breadcrumb displayed in Quick Edit

As in the standard list and document library views the breadcrumb will be visible to users in Quick Edit. This will be useful for working out what filters have been applied and reversing one filter at a time to get back to the larger data sets.


SharePoint list showing quick edit breadcrumbs
Quick Edit breadcrumbs


User defined column formatting

Users can now set their preferred column width by dragging in Quick Edit. The user defined widths will be retained when users navigate to Quick Edit. Users can also use drag and drop in Quick Edit to re-order columns.

SharePoint list showing column formatting
Column formatting in Quick Edit


Improved people picker

Finding people within your organisation has been simplified. Search results are returned for partial name matches and user's photos and titles are displayed in line.

SharePoint list showing people picker
People picker in Quick Edit
Read more

PowerApps Tips and Tricks

  • Posted by: Hayden Sinclair

I present a few of the latest tips I have picked up whilst developing SharePoint based PowerApps for some of my Auckland, New Zealand based clients.

Use your most powerful computer and 64 Bit Browsers

If you have a large number of columns on a screen, PowerApps can slow down and be clunky to use.   To avoid performance issues use your most powerful computer and make sure you have a 64 bit browser installed.

You can download 64bit Chrome from Google.  

This performance tip is reinforced from the PowerApps blog post.

Browser running out of memory (July 23, 2018)

If you run out of memory while using PowerApps, please consider downloading a 64-bit version of Chrome, Edge, or Internet Explorer.

Microsoft: Common Issues and Resolutions.


Formatting can be a nightmare

Be wary when making multiple format changes at the same time. 

Formatting issues are particularly evident when making changes to the width of datacards.  Even though you can select multiple data cards and change each of their widths all at once, it is not recommended. 

PowerApps can automatically reshuffle your datacards and there is nothing you can do to put them back in order!  You can rearrange your order as often as you like to no avail.  If PowerApps wants Question 3 to go ahead of Question 1 after you have resized your datacards, then that is where Q3 is going… 

Multiple selection is handy for non-size formatting changes, like background color, but be very wary when changing the size of any element!     


Unlimited Undos?

If you do make a change to multiple columns at once and need to get your order back, you can click CTRL Z to undo your latest mistake.   Note, when you change multiple elements at once, undo will only undo each change at a time.  So if you select five datacards and resize them all at once, you will have to click the undo button 5 times to get back to where you were.  If you changed the size and background color that will be 10 undo’s…


It seems PowerApps Studio stores a very large number of your actions ready to be undone.  I made a change to 30 datacards at once yesterday, and had to immediately undo the change as the cards did the automatic reshuffle of death (see Formatting can be a nightmare)!  I was clicking the undo button for 15 minutes to get back to where I was.  This constituted many hundreds of individual actions, but PowerApps studio was up to the task.


PowerApps Desktop Version

When I first started developing PowerApps the Client Desktop version could be used for creating and editing your PowerApps.   This is no longer the case.  PowerApps Desktop can now only be used to open or test your apps. 

This is not a huge loss. The desktop editor occasionally crashed, which was very annoying if you forgot to save in the last few minutes.   Saving is not a problem in the online version that autosaves at regular intervals.

Autosave can be problematic as you cannot experiment with formatting changes etc, and then revert to a previous unsaved version to rectify your mistakes.  You can go back to a previous published version, but this is not useful for Live applications.


Shane Young’s Videos

If you are new to PowerApps, or moderately experienced, or even an expert then Shane Young’s YouTube channel is a must see.   Shane seems to able to get in touch with his mates at Microsoft to give him inside tips on the best way to get things done.  If you work your way through each of these videos you will be a PowerApps expert within weeks!

He also has great videos on Microsoft Flow and PowerBI so be sure to check out his channel.

Finally, have you had a chance to check out SitePac, my newly released SharePoint Templates.  We can quickly install these SharePoint based templates in your Office365 environment to get your Instant Intranet up a running in a flash. 


Read more

Kick start your Intranet Project with SitePac SharePoint Templates

  • Posted by: Hayden Sinclair

The SharePoint Agency have completed multiple intranet projects for our clients.  Our experience has led us to conclude that between 50% and 75% of New Zealand intranets are structured in exactly the same way.  

Pragmatic customers beg us to roll out the same intranet we built for our latest client.   

Now we can.

The SharePoint Agency is proud to announce the launch of SitePac.   SharePoint Agency templates developed specifically to kick-start your New Zealand SharePoint project.

SitePac is installed directly on your Office 365 environment, using 'out of the box' SharePoint functionality (we use SharePoint Site Collections, Sites and Document Libraries and wire them up to SharePoint's mega-search engine).  After we install, you are free to manage, migrate and maintain your content as you wish. 

Support is available via our weekly SitePac training sessions, or by purchasing a dedicated SharePoint SitePac support package.

Visit SitePac to find out more about our offering.  


Read more

Live Streaming comes to Microsoft Stream

  • Posted by: Hayden Sinclair

User have been able to live stream from consumer sites like YouTube or Facebook for a few years now. Live Streaming functionality has now also been introduced to Office365's Microsoft Stream.

Corporations will be able to live stream staff meetings, announcements, board meetings and presentations secure in the knowledge that only authenticated users are viewing the content.  

After the event is braodcast, the video can be viewed on demand, with intelligent AI features providing:

  • Speaker timeline useing AI facial detection to identify who is talking.
  • Speech-to-text and closed captions.  Although the AI is not so great on the New Zealand accent quite yet.
  • Transcript search and timecodes which let you find content in the video.
Read more

PowerApps nearing half of our Auckland based SharePoint work

  • Posted by: Hayden Sinclair

I have noticed a significant increase in enquiries from my Auckland customers about wanting to use or create PowerApps.  Since Microsoft introduced editing PowerApps within SharePoint lists I find I am spending almost half my time either creating custom list based PowerApps or more advanced mobile PowerApps linking two or more SharePoint lists together.

The next step for Microsoft must surely be to add PowerApps customizations for document library metadata.    

If you are planning on creating your own PowerApps, remember to keep in mind that the end goal isn’t to make independent PowerApps that have no relationship to your other corporate data.  The goal is to ultimately link all your like data together in PowerBi so you can create meaningful Business Intelligence from you content.  You can only do this with planning and making sure you reuse Site Columns across all of your PowerApp lists.

If you are not sure what I am talking about, or how to achieve this, best give me a call now rather than a year down the track, when you find out!

Read more

SharePoint Spaces - Virtual Reality in Auckland SharePoint Sites

  • Posted by: Hayden Sinclair

I found the most exciting announcement from SharePoint Conference North America, held in Las Vegas on May 21-23, 2018 to be SharePoint Spaces.


Microsoft have announced upcoming support for Virtual Reality or Windows Mixed Reality within any modern SharePoint page.  You can create your own immersive Mixed Reality experience by adding web parts to your SharePoint Space.  You can set the background 360 image and link to Power Bi Reports, 360 videos and any other api you could care to create.


The simple SharePoint interface will be far easier to navigate for content creators than developing in 360 game development software like Unity.


At first glance the idea of Mixed Reality seems like a gimmick.  But if you want to convey a message in as little time as possible you really can’t go past a full 360 experience.  Corporate Inductions, plant tours, health and safety briefings will be more effective via a Mixed Reality experience than a simple PowerPoint or flat website based approach.


Giving new employees a tour of your document management system in a fully immersive 360 experience will transform an otherwise mundane task into an enjoyable and productive experience.


I have signed up for the  early access program.  Fingers crossed they decide they need someone in Auckland to help them out!

Read more

Getting to know PowerApps

  • Posted by: Hayden Sinclair
Over the last couple of months, I have been creating more apps for my Auckland, New Zealand clients using Microsoft PowerApps. The flexibility and speed of development make PowerApps perfect for the New Zealand market. New Zealand companies typically have smaller budgets and engage in iterative software projects. PowerApps are perfect for allowing companies to improve their software on the move, and with the ability to save content back to a SharePoint list and to produce a Mobile App, make PowerApps applications great value for money.

Here are a few of my thoughts on the latest changes in PowerApps as of January 2018.

Managed Metadata Columns are now supported for SharePoint Lists.

As Managed Metadata is useful for collecting cross-organisation tags it is great to finally see Managed Metadata Columns supported in PowerApps. There is some work to be done yet, but the latest release is showing good progress. You can now add new terms via a PowerApp field and select multiple terms for your Managed Metadata column. The presentation still needs some work, when adding multiple terms however!

Loading Times

The loading times of PowerApps were slow six months ago. With each new realise the loading times are getting faster and faster. When customising a SharePoint list check out the Delayed Load option. Click on File > App Settings > Experimental Features > Delayed Load to see the feature in action.

Customisations

Although coding every element takes a bit to get used to, I am starting to enjoy the expandability of being able to add code to any field, gallery or button you want. After working with InfoPath for years, I learnt to live within the limitations of the product. It seems to me that there just might be a way to do anything within a PowerApp. I like it!

Connectivity between Systems

Sharing data between multiple Enterprise applications or even between different Microsoft applications used to be a notoriously difficult and expensive process. PowerApps connectors are making life easier for all of us. You can easily pull content from multiple Line of Business applications, and display them on the same screen using PowerApps connectors. This to me is the killer feature of PowerApps! There is even a connector for Project Online!

Mobile in Minutes

I spent years putting together mobile apps using Eclipse and PhoneGap. PowerApps lets you get an app published and on to your user's mobiles within minutes. You can save your data back to a SharePoint list and then add workflows via Flow or SharePoint Designer! At the moment it is not dead easy to add images to a SharePoint list from your mobile, but you can do it with some perseverance. And Microsoft are working on improving image functionality in the near future.

Rules

I find the rules functionality to be a little clunky, but it is very useful for giving you code tips to add to your PowerApps fields manually. I use the Rules tab to create a rule, then I copy the code and paste it directly into my own PowerApps fields. I have found it faster to add a snippet of code to multiple fields in a form, then to add multiple rules to the same fields.

Copy Copy Copy

The best way to learn how to create a PowerApp is to start with the demos or samples available on the PowerApps site. Create an App based upon one of the templates, then steal the code from this sample app and apply it to your own blank test App.

Early Days

PowerApps is still in the early stages of development, but the speed at which the improvements are coming is very heartening indeed.


Read more

My SharePoint Search Title does not display the Document Title

  • Posted by: Hayden Sinclair

Here is a recent SharePoint Search related question from my one of my favourite Auckland clients.

"I am trying to configure the Recently Updated Items webpart, to display the Title of the document (or the name). However, the webpart appears to display the first words within the document itself.  Where is says “RESTRAINT OF TRADE” I want it to say “Contractor – Non Compete Clause” which is actually the title of the document.  Please help!"


By default SharePoint search uses the Metadata Extractor Title to display the item title in search results.  This was useful when everyone uploaded their documents as Document, or Untitled Document, but these days it usually is just annoying.

To change this default setting...

Go to  Site Settings > Search Schema.


Type Title in the Managed Property field Title, then click on Title


Select MetadataExtractorTitle and MOVE DOWN until it is at the bottom of the list.   The search engine will now feature the Title before TermTitle then Office2 etc BEFORE finally it reaches MetadataExtractorTitle as the final backup.


Once you make this change, you have to wait for the search engine to recrawl your content, before you will see the change take effect.  This can take a while.  To speed up the process you can visit each document library, go to Library Settings > Advanced Settings and then Reindex Document Library to force a recrawl.  You may have to wait a few hours to see the changes take effect.

If you are interested here is the Microsoft explanation on how the Title is extracted for SharePoint search.


Read more

12 tips for SharePoint Document Libraries

  • Posted by: Hayden Sinclair

Document Managers love SharePoint. Particularly when migrating from systems like Lotus Notes, Dropbox, Google Docs, or the Corporate File Share.

As an Auckland SharePoint specialist, I have helped migrate a few Document Libraries in my time. Here are some tips for setting up your document libraries in SharePoint.


Create custom Content Types

Custom Content Types are easier to roll up in Content Query Web Parts and are easily used to populate Search Query web parts. With SharePoint moving towards Search as the preferred method of displaying content, assigning custom content types to your libraries helps future proof your installation.


Assign one Content Type per Document Library

When you assign a custom content type to your library, immediately delete the default Document or List content type to avoid confusion.

In my experience users don’t understand the idea that multiple Content Types can reside in the one Document Library. Users do, however, intuitively grasp that different types of content go into different document libraries.

If users need documents with different content types, create two document libraries, rather than training them to use the New > Content Type button.


Store Content Types in your Content Type Hub

In Office 365 the Content Type Hub is a “hidden” Site Collection located at https://yourcompany.sharepoint.com/sites/contentTypeHub/ 

The largest benefit of utilising the Content Type Hub is ease of management. If all Content Types are stored in your content type hub, you know exactly where to find them when they need to be updated.


Store Site Columns in your Content Type Hub


Again for ease of use, add Site Columns into your Content Type Hub.

Storing all of your Site Columns in the Content Type Hub will also ensure you always reuse Site Columns, rather than recreating them all in each different Site Collection.


Map your Site Columns to Refinable Strings

Mapping Site Columns to Refinable Strings allows you to utilise your columns in Search Refinement Panels and Search Display Templates.


You can group mutually exclusive Site Columns into one Refinable String.

Office365 provides a maximum of 200 RefinableStrings.  You may never hit this target. But bear in mind you can stack more than one Site Column into a single Refinable String.

For example, if you have a Finance column (used for Finance Document Libraries only), an HR column (used for HR Document Libraries only), and a Marketing column (for Marketing Document Libraries only) you can map them all to RefinableString01. As a document will never be added into each of these libraries, you can easily use the single Refinable String for each column.

Mapping many columns to one RefinableString allows you to chunk these specialised fields into the one Search Refiners.


Use Folders when uploading, but not when displaying content

When uploading documents to a library, folders can be used to set default metadata values for your items. You can set default values for each folder in Document Library Settings > Column Default Value Settings.

Once items are uploaded you can hide the folders from your views.  The Group By function is a better way to display content in views then Folders.


Adjust Versioning before migrating documents.

The default setting for a new Document Library is Create Major Versions. This means that SharePoint will create a major version of your Document every time you update your Metadata Columns. You might therefore get up to Version 6 of your document before you push your library live. This can be confusing for your users.

So before your begin to migrate your documents try setting Versioning to No Versioning.  Then once you have added your content and adjusted your metadata turn it back on.

Library Settings > Versioning Settings > No Versioning

Another approach is to turn on Major and Minor (draft) Versions before you start uploading any documents. This approach will start creating items from version 0.1, just remember to Publish a Major version of your document before you go live.

Library Settings > Versioning Settings > Major and Minor (draft) Versions


Insert Quick Parts into your Managed Documents

The Quick Parts feature of Microsoft Word is very useful when publishing Documents.

Document Managers love to include fields like the Document Name, Owner, Approver and Approved Date into the footer of their Documents. Some Document Managers do this manually, but SharePoint allows us to insert these fields dynamically via Word’s Quick Parts feature.

Quick Parts allow you to insert the value of a Document’s SharePoint Column directly into your Word Document. So instead of typing “Jim Jones” into the Document Owner box, you can insert your SharePoint Document Owner field and “Jim Jones” will dynamically populate into your Document.
This is useful, as when Jim Jones leaves the company you just have to update the Document Owner column in SharePoint and your Word Document will update to show your new Owner.

Note: Quick Parts are only available in Word, not Excel, PowerPoint, Visio or PDF’s. Move away from using these file types, if you can, especially if the item can easily be recreated in Word.


Create a label field


System fields (like Version or Created Date) cannot be inserted as quick parts. To get around this Office limitation create a Label to include in your managed documents.

There are two ways to activate labels for your Document Library. The method you choose will depend on whether you are using custom content types or not.

If you have an out of the box document library (i.e. no custom content type)
Go to Library Settings.

  • Click Information Management Policy Settings
  • Choose Document
  • Check the Labels tick box.
  • To add version into the label, type {Version} into the Label Format field

Click OK and this will add a Label column to your Document Library.


You can use this label in your views, but it is most likely to be used as a Quick Part in your Word document.

To insert the Label into your Word Document.
Open Word, Insert > Quick Parts > Document Property > Label.


This will insert {_UIVersionString} into your document. Don’t worry this will be replaced with the version when you save and reopen the file.

If you are using a Custom Content Type

  • Go to Library Settings.
  • Click on the Content Type name (e.g. HR Documents) under the Content Type section.
  • Click Information Management Policy Settings
  • Check the Labels tick box.
  • To add version into the label, type {Version} into the Label Format field.
  • Click OK and this will add a Label column to your Document Library.


Migrate Word Document Content to Wiki Pages

Document Managers usually want to maintain content in Word Documents, but have you ever seen a Word or PDF doc shared on Facebook? Have you ever tried opening a Word or Excel file on your mobile?

The Word Loading tile is the new Blue Screen of Death. You don’t have to force your users to open word to view your content. Embrace the web based nature of SharePoint and try presenting your information on a wiki page!

As Word files are great for printing, editing, and emailing you may have to maintain a word file as well as your wiki page for frequently accessed content. You can add a link to a Word version of your content in the Wiki page.


Encourage Document Managers to Migrate content themselves.

Training has to start somewhere, so why not on day one?

Document managers are in the best position to determine if a document is really needed.  It will also give them an appreciation for how much content they really have.


Read more

Keyword Query Language (KQL) Cheat Sheet

  • Posted by: Hayden Sinclair
Read more on Keyword Query Language (KQL) or check out The SharePoint Agency cheat sheet below...

Typing more than one term is equivalent to adding AND between your terms.

Banking Industry
​will return the same results as...
Banking AND Industry

Adding a wildcard (*) will return everything!​

Adding a wildcard (*) after a word will enable prefix matching.
bank*
is the same as
Banking AND Bank AND Banker

Use property restrictions

author:Hayden
filetype:docx
Filename:"Leave Request Form"

Beware as author: "Hayden Sinclair" (with a space)
is the same as
author: AND "Hayden Sinclair"

Apply multiple property restrictions in the same search.
author:Hayden
filetype:docx filetype:pdf
filename:"client terms and conditions" filename:"New Business Card Design"

Using the same property is equivalent to adding an OR between your terms.


author:"Hayden Sinclair" OR author:"Jim Khan"
filetype:docx OR filetype:pdf
filename:"client terms and conditions" OR filename:"New Business Card Design"


NOT will remove results with your offending term.

Information NOT Technology

NEAR will show words in close proximity.

Christchurch NEAR Technology

You can also specify how close
Christchurch NEAR(n=10) Earthquake
Christchurch NEAR(n=50) Earthquake​

WORDS will rank both or your terms together rather than separately.

Words(Chch, Christchuch)
is the similar to
Christchurch OR Chch

But items with both Chch and Christchurch will count together and will rank higher


Quotation Marks will turn your search into a Phrase.

Banking Industry
versus 
Banking Industry
​will return the same results as...
Banking AND Industry 

Time Specific Queries.

write=today
write=yesterday
write=this week
write=this month
write=this year


Taxonomy Search.

owstaxidtags:Site Map
owstaxidtags:Auckland
 owstaxidtags:New Zealand


Read more

Change the value of a SharePoint Choice field on a custom page

  • Posted by: Hayden Sinclair

You can change the value of a SharePoint Choice field in a customised SharePoint page (i.e. a new form page created in SharePoint Designer). 

This post describes how to change the form status from Awaiting Approval to Approved on a customised ApproveForm.aspx page and how to set the Approver to the current user at the same time.  


Instructions

Copy the script below and paste it into Notepad.  This script will swap out your drop down choice and change the value of a people picker field.

Swap out the highlighted fields.  The blue highlighted field is for your choice field.  The orange highlighted field is for your People Picker field.

Be sure to swap out the options on the green highlighted field with your status options, and change the selected option for the value you want to default to.

<script type="text/javascript">

var context = null;

var web = null;

var currentUser = null;

ExecuteOrDelayUntilScriptLoaded(GetUserLoginName, "sp.js");

function GetUserLoginName() {

context = new SP.ClientContext.get_current();

web = context.get_web();

this._currentUser = web.get_currentUser();

_currentStatus ='<option selected="Selected" value="Approved">Approved</option><option value="Rejected">Rejected</option><option value="Withdrawn">Withdrawn</option>';

context.load(this._currentUser);

context.executeQueryAsync(Function.createDelegate(this, this.onSuccessMethod),

Function.createDelegate(this, this.onFailureMethod));

}


function onSuccessMethod(sender, args) {


document.getElementById('ctl00_ctl35_g_5c17d614_9a6a_475f_9ba4_a84c4b475818_ff91_ctl00_DropDownChoice').innerHTML=_currentStatus;

document.getElementById('ctl00_ctl35_g_5c17d614_9a6a_475f_9ba4_a84c4b475818_ff81_ctl00_ctl00_UserField_upLevelDiv').innerHTML=this._currentUser.get_title();

}


function onFaiureMethod(sender, args) {

 alert('request failed' + args.get_message() + '\n' + args.get_stackTrace());

 }

</script>


Go to the ApproveForm.aspx page in Internet Explorer

Click Cog > Edit page

Click Add a Web Part


Choose Media and Content > Script Editor


Click Add


Click Edit Snippet, paste in your code from Notepad, and click Insert


Select the Page Ribbon, then click Stop Editing

Finished.  Now when a Manager goes to our ApproveForm.aspx page, their username will populate in the Approver field (in this instance) and the Status will default to Approved.


Read more

Wiki Pages are better than Word Documents for your Intranet

  • Posted by: Hayden Sinclair

I have been advising Auckland companies about Content Management for a number of years.  Every company, I work with, struggles with the best way to distribute content. 

I maintain the best way to popularise content is to get rid of your documents. 

Copy content out of PDF and Word files and paste it into SharePoint wiki pages.  Word is a great tool for creating content, but not for distributing content in our browser-based world.  Wiki pages are just more effective.


5 reasons Wiki's are better than Docs.

  1. Accuracy: The timeliness or accuracy of Word content is instinctively doubted by users (is this really the latest or indeed correct version?)
  2. Load Time: It takes time to load the Word or PDF application before you can read the content (I call the Word loading screen the new "blue screen of death!")
  3. Effort: Few users will scan or search through a 50 page document to fine the one paragraph they need.  Breaking a 50 page document into multiple wiki pages will make it easier to find the paragraph you are after.
  4. Popularity: Users don't see Word or PDF files anywhere else on the internet (just at work)
  5. Mobile: Word and PDFs are annoying for mobile users.


Accuracy

The Internet has taught users to accept timely content is served in a browser window.  Users now instinctively doubt accurate content will be found in a static Word or PDF file unless it is emailed to them that morning.  At the back of a user's mind is the uncomfortable feeling they are not viewing the latest version of the document.  Simply by moving the same content on to a department's maintained Wiki page will allay these fears.


Load Time

Opening documents in client applications adds an additional step to the discovery process.  Longer load times increase the chance users will abandon search, and revert to trawling through file shares, or worse ringing or emailing you to find the information for them!


Effort

Document creators love creating overly long documents.  50+ pages, might be OK if you are creating a policy to be printed and read, but is unacceptable on a web page.  Overlong documents must be broken down into manageable pages.  The shorter these pages, the easier it is for end users (via search engines) to find the content they are after.   


An annoyance in the Internet Age is the persistence of the Title Page, Revisions Page, Sign-Off Pages, Tables of Contents Pages, all of which get scrolled through to read the content itself.  These pages are safely removed from wiki content.  Sign-Off Dates, and Approving Managers become values in associated Site Columns rather than the content of the first five pages of a seven page document.


Popularity

End users rarely see Word Documents or PDF's in the wild.  Nobody shares PDF's or Word Documents on Facebook.  A PDF will never go viral.  Few retweet links to Word Documents.  Users are comfortable with the familiar, and in the digital age that is content served on a web page.


Mobile

As any mobile user will attest, opening Word or PDF files on a mobile, is tedious.


After you copy content to a wiki page you may need to maintain Word or PDF versions of files (these formats are useful for emailing to clients or printing), but the goal of your intranet should be to present content in the web browser first.


After copying a few word documents into a Wiki to prove my point, most clients see the light and are happy to apply the concept to the rest of their content. 

It really is a two minute lesson for users to learn how to add content to a Wiki

  1. Edit any wiki Page
  2. type New Page Name
  3. save page
  4. click on the New Page Name link
  5.  add content to new page
  6. click Save.

 Good luck transferring your content to Wiki pages.  You won't regret it.

Read more

Sorting search results in a SharePoint Content Search Web part

  • Posted by: Hayden Sinclair

The content search web part is great at collating data from your site.  One of the best features is Sorting, which is available when you click on Switch to Advanced Mode in the Basics tab.


 Click Switch to Advanced Mode to show the Sorting tab in the Content Search Web Part.

You will not be able to sort by fields like DMSDocTitle, or Filename, you can only sort by mapped properties.

Sorting by DMSDocTItle does not work.


Try mapping displaytitle to a Refinable String (in my case RefinableString31) and then use RefinableString31 to sort your search results.


Sorting by displayTitle mapped to a refinablestring does work!


Note: Each time you map a property to a refinable string you will have to wait for your Full Crawl to test your results. Once you map displayTitle, be patient, you may have to wait until tomorrow, or even after the weekend, to see if it works. 


Map a managed property to a refinablestring. 

To map displayTitle to a refinable string go to

Site Settings > Schema then search for RefinableString. 

Edit a free refinable string and add your column under the Mappings to crawled properties section, by clicking Add a Mapping.


Read more

How to pre-populate user details in a Customised NewForm.aspx page

  • Posted by: Hayden Sinclair
Pre-populating a Current User's Display Name, Username, or First Name - Last Name in the People Picker field of NewForm.aspx is harder than necessary.

Your method varies depending on whether your form is an out of the box (i.e. NewForm.aspx) or a customised SharePoint form (i.e. a new form page created in SharePoint Designer). 

This post describes how to pre-populate user details on a customised MyNewForm.aspx page.  If you have not customised your page in SharePoint Designer, see How to pre-populate user details on a NewForm.aspx page.


InfoPath

As an InfoPath Developer it is easy to set the Current User Details in an InfoPath Form (if your SharePoint Installation is on-premise). 

If you are using SharePoint Online with Office 365, there is workaround, for finding user details in an Office 365 InfoPath Form.   Though you cannot pull down near as many user fields.


Set username on MyNewForm.aspx with Script Editor Web Part

To pre-populate user details on a customised SharePoint MyNewForm.aspx page follow these instructions.


Copy the script below and paste it into Notepad

<script type="text/javascript">
var context = null;
var web = null;
var currentUser = null;
ExecuteOrDelayUntilScriptLoaded(GetUserLoginName, "sp.js");
function GetUserLoginName() {
context = new SP.ClientContext.get_current();
web = context.get_web();
this._currentUser = web.get_currentUser();
context.load(this._currentUser);
context.executeQueryAsync(Function.createDelegate(this, this.onSuccessMethod),
Function.createDelegate(this, this.onFailureMethod));
}

function onSuccessMethod(sender, args) {

 var today = new Date();

document.getElementById('ctl00_ctl41_g_dd153288_802d_4b13_b21f_c95c4da8deab_ff61_ctl00_ctl00_UserField_upLevelDiv').innerHTML=this._currentUser.get_title();
//change the ID here to your people picker field ID. Get the id for this field with the help of IE developer tool.
}

function onFaiureMethod(sender, args) {

 alert('request failed' + args.get_message() + '\n' + args.get_stackTrace());

 }
</script>


Go to the MyNewForm.aspx page in Internet Explorer


When using Internet Explorer click F12 to open Developer Tools.


Click on the DOM Explorer Tab and choose the Select Element tool (or CTRL B)


Using the Select Element tool, click into the Requested By​ field.


Copy the People Picker field ID – in this example the id is "ctl00_ctl41_g_dd153288_802d_4b13_b21f_c95c4da8deab_ff61_ctl00_ctl00_UserField_upLevelDivand copy this into the document.getElementById section in notepad.


Click Cog > Edit page

Click Add a Web Part


Choose Media and Content > Script Editor


Click Add


Click Edit Snippet, paste in your code from Notepad, and click Insert


Select the Page Ribbon, then click Stop Editing

 
Finished.  Now when a user creates a New Form, their username will populate in the Requested By people picker field.


This method will work if you have customised your New Form page (i.e. if you are using MyNewForm.aspx). 

It will also work if you have NOT customised your form page.  If you have not customised your page you may find this option easier to follow How to pre-populate user details on a NewForm.aspx page.

Read more

Pre-populate user details on NewForm.aspx with a Script Editor Web Part

  • Posted by: Hayden Sinclair
Pre-populating a Current User's Display Name, Username, or First Name - Last Name in the People Picker field of NewForm.aspx is much harder than it should be.

Your method varies depending on whether your form is an out of the box (i.e. NewForm.aspx) or customised SharePoint form (i.e. a new form page created in SharePoint Designer). 

This post describes how to pre-populate user details on an out of the box NewForm.aspx using a Script​​ Editor Web Part.  If you have customised your page in SharePoint Designer, see Pre-populate Current User on a customised MyNewForm.aspx page


InfoPath

If you are an InfoPath Developer then setting the Current User Details in an InfoPath Form is a straightforward process.   Well as long as your SharePoint Installation is on-premise. 

If you are using SharePoint Online, there is workaround, for finding user details in an Office 365 InfoPath Form.   Though this method is not nearly as powerful.


Set username on NewForm.aspx with Script Editor Web Part

To pre-populate user details on an out of the box SharePoint NewForm.aspx page follow these instructions.


Download the latest jquery SP Service (i.e. jquery.SPServices-0.5.3.min.js) then upload your jquery file to your Site Assets library.


Copy the script below and paste it into Notepad


<script src="https://ajax.microsoft.com/ajax/jQuery/jquery-1.4.2.min.js" type="text/javascript"></script>

<script src="/sites/MySharePointSite/SiteAssets/jquery.SPServices-0.5.3.min.js" type="text/javascript"></script>

<script type="text/javascript">

$(document).ready(function () {

 var loginName= $().SPServices.SPGetCurrentUser();

SetUserFieldValue("Requested By",loginName);


function SetUserFieldValue(fieldName, userName) {

 var _PeoplePicker = $("div[title='" + fieldName + "']");

 var _PeoplePickerTopId = _PeoplePicker.attr('id');

 var _PeoplePickerEditer = $("input[title='" + fieldName + "']");

 _PeoplePickerEditer.val(userName);

 var _PeoplePickerOject = SPClientPeoplePicker.SPClientPeoplePickerDict[_PeoplePickerTopId];

 _PeoplePickerOject.AddUnresolvedUserFromEditor(true);

}

});
</script>


Update the jquery link on line 32 to point to jquery in your SharePoint Site Assets library.
<script src="/sites/MySharePointSite/SiteAssets/jquery.SPServices-0.5.3.min.js" type="text/javascript"></script>

Update SetUserFieldValue("Requested By",loginName);  on line 37 to the name of the people picker field in your form.  Type the field label exactly here (e.g. Manager Name, or Approved By etc).
SetUserFieldValue("Requested By",loginName);

Copy your script again.

Go to the NewForm.aspx page (you can get there by clicking the New button).

Click Cog > Edit page

Click Add a Web Part


Choose Media and Content > Script Editor


Click Add


Click Edit Snippet, paste in your code, and click Insert


Select the Page Ribbon, then click Stop Editing


Finished. Now when a user creates a New Form, their username will populate in the Requested By people picker field.


Not working?  Have you got a Custom NewForm Page?

If you have customised your NewForm.aspx page in SharePoint Designer, check out Pre-populate Current User on a customised MyNewForm.aspx page
Read more

'GetUserProfileByName' via the (hidden) User Information List

  • Posted by: Hayden Sinclair
A​ good InfoP​ath​ Developer should save user's time when completing a form.


Auto populating details like Name, Username, email address, phone number and department can slice a minute or two off form completion time.   


A one minute saving per form, on ten thousand forms a month, will save humanity 166 hours, or one full time equivalent employee!


When developing an InfoPath form on-premise I use the GetUserProfileByName method to populate common user fields, by creating a data connection to https://sharepoint-agency/_vti_bin/userprofileservice.asmx?WSDL 


Try this method on SharePoint Online with Office 365 and you will be rewarded with the "An error occurred while connecting to a Web Service" Error message.


Microsoft have purposefully disabled access to the User Profile service to Prevent Loop Back issues.


All is not lost.


To populate common user fields create a Data Connection to the (hidden) User Information List located at the top level of your SharePoint Online site.

https://sharepoint-agency.sharepoint.com/_catalogs/users/detail.aspx


You can pull down many of your favourite user details (though not all) to populate​ your form.


Read more

Download Managed Metadata Term Set for Countries

  • Posted by: Hayden Sinclair

When creating a Country column in SharePoint, it is best to use a Term Set to store Country names. 

Managed Metadata is pefect for Countries. 

  1. 206 nations, from Afghanistan to Zimbabwe, are too many to fit in a drop down list. 
  2. If a country changes name you can update once in your Managed Metadata.  The new name will then populate throughout your site. 
  3. If one Country is annexed by another, you can use the Merge Terms function to join the two countries together.  Once you merge the Terms you can then add a Synonym, for when users type in the previous name.
  4. Synonymns can also be set up for Countries that have changed name in the past (Rhodesia can be set as a Synonym for Zimbabwe, USA, US, United States, United States of America should be set for the U.S.A.) or for Acronymns (i.e. NZ, USA, Aus, NED).   


Country Term Set

I sourced the list of Countries from the United States of America State Department, and added them to Import Term Set csv provided by Microsoft.

Country-ImportTermSet.csv


How to import the Country Term Set.

Go to the Managed Metadata service for your site.

Site Settings > Term Store Management.

Click the little arrow to the right of your category name and then click Import Term Set


Click Browse

Select the term set you just downloaded (it is probably in your downloads folder).

Click OK


SharePoint will import your Countries.


Countries are now available in your term set.


You can now create a Managed Metadata Column, choosing your newly imported Country Term Set as your source.

Read more

SharePoint GUID Encoder Decoder

  • Posted by: Hayden Sinclair
SharePoint uses a log of GUID's.

We all know that GUID stands for Globally Unique Identifier, but we may never know why sometimes SharePoint displays GUIDs with parenthesis and dashes, while other times GUID's are presented with %7B's and %2D's


When you need to get all of your GUIDs in a row, it is a frustrating task to pluck out a View ID when you need it.

/_layouts/15/ViewEdit.aspx?List=%7B832BEA72%2DFDA3%2D4190%2D832E%2DE49726C77C0C%7D&View=%7B0FCC097F%2DCAC2%2D4286%2D8BBB%2DF31029EF4B8E%7D


This is where Eric Meyer's awesome URL Decoder/Encoder comes to the rescue​.  Just paste in your GUIDs click Encode or Decode and transfer them to the format you require!


/_layouts/15/ViewEdit.aspx?List={832BEA72-FDA3-4190-832E-E49726C77C0C}&View={0FCC097F-CAC2-4286-8BBB-F31029EF4B8E}​

Read more

Five tips to improve the findability of your SharePoint Content

  • Posted by: Hayden Sinclair

Improving the findability of your web content by search engines like Google and Bing is big business.  Many practitioners can help with your Search Engine Optimisation or SEO for your public facing website.

As an employee in a company with SharePoint, you too can maximise the findability of the Word Documents, PowerPoint files and Excel Spreadsheets that you upload to your intranet.  Having your documents appear higher on your Intranet's search results then your co-workers has to be a good thing, if only for bragging rights!


Five tips to improve the findability of your documents in SharePoint Search Results.  

  1. Make the title of your document as descriptive and catchy as possible.  The title is typically weighted highest when a user scans their search results page.  The more someone clicks on your document, the higher the search engine will rank your document the next time someone searches on those keywords.
  2. Target a human audience with your title, but add as many (natural) keywords as you can for the search engine.
  3. Include Header Styles (H1, H2, H3, H4 etc) in the content of your word documents.  Keywords located in headers are ranked higher than keywords in Paragraphs, so include keyword rich content in each of your headings.
  4. For Excel files add a tab called Description and write a human readable description for your spreadsheet.  Not many people include key words in excel files, so a descriptive paragraph will provide your search engine with keyword gold!
  5. Fill in all of your Metadata categories every time you upload a document.  Make sure you complete every metadata field on the Edit Properties page, whether it is compulsory or not!  If you fill in this field and your co-worker doesn't then there is a good chance you will rank higher on the search results page.
Read more

Error 0x800700E0 Access Denied when copy files in Office365

  • Posted by: Hayden Sinclair

When using the SharePoint “Open with Explorer” button, to copy files to your computer, in Office 365, you may find yourself embraced with the following error message.


Error 0x800700E0: Access Denied.  Before opening files in this location, you must first add the web site to your trusted sites list, browse to the web site, and select the option to login automatically.


There are two steps to overcome this issue.  Firstly make sure you have added your Intranet to your trusted zones within Internet Explorer.


Trusted Zones

Open Internet Explorer then go to Internet Options > Security > Trusted Sites > Sites

 Type in your intranet address (e.g. https://myintranetsite.sharepoint.com) and click Add.


Keep Me Signed In

Secondly, log out of Office 365 in Internet Explorer, close your browser and go back to the login page.  Now check the Keep me signed in box, before entering your username and password.


You should now be able to copy files to your desktop.


Read more

Server Error - You need a more recent version of SharePoint Designer

  • Posted by: Hayden Sinclair

An as Auckland, New Zealand based SharePoint Developer I have worked with SharePoint long enough to not be surprised when annoying error messages pop up.  In this case...

Server error: The version of Microsoft SharePoint Foundation running on the server is more recent than the version of SharePoint Designer you are using. You need a more recent version of SharePoint Designer.


I haven't​ seen this error in a while, and I knew it had nothing to do with using the wrong version of SharePoint Designer, so I restarted my computer, logged into the site via Internet Explorer, opened SharePoint Designer and it went away.


Perhaps a restart is all you need as well?  Give it a try.

Read more

The term store may be unavailable

  • Posted by: Hayden Sinclair

As an Auckland, New Zealand based SharePoint Consultant I often find myself updating terms using the Term Store Management Tool.  Recently, I came across the following error message


"This operation cannot be completed.  The term store may be unavailable."


Initially I thought it was a connection error, so I waited a few hours and tried again.  Alas I was rewarded with the same error message.


After some detective work I discovered, that the error was in fact my fault.  When you add an Other Label that is the same as your Default Label you will get the error message.  In the following example I added Logos in the Other Labels field, when it was already added in the Default Label field.

Term-Store-Unavailable-1.jpg

You will also get this error message if you add an Other Label that is already set as an Other Label.  In the following example I added Logos as an Other Label, when Logos was already in the Other Labels list.

 Term-Store-Unavailable-2.jpg

So the fix is to check that you haven't entered the same term twice.  Hopefully, this will save you some time and perhaps Microsoft will update their error message to be a little more descriptive in a future release.​ ​

Update November 2015: This issue has now been resolved in Office 365. Though it may well still appear in an on-premise installation. ​


Read more

XSL in SharePoint Cheat Sheet

  • Posted by: Hayden Sinclair

When creating styles in the Content Query Web Part or creating an Item View in SharePoint Designer 2013, you have to get to grips with XSL formatting.

Here are some of the attributes I find myself using regularly while consulting to my Auckland based SharePoint clients​. 


URL or Links

<a>

<xsl:attribute name="href">

<xsl:value-of select="@DispForm"/></xsl:attribute>

<xsl:value-of select="$DisplayTitle"/>

</a>


Or to add a “Read More…” link

<a>

<xsl:attribute name="href"><xsl:value-of select="@DispForm"/></xsl:attribute>

read more…

</a>


Dates

To display the date for New Zealand (e.g. 30 March 2016). 

<xsl:value-of select="ddwrt:FormatDate(@StartDate, 2057, 3)"/>

Change the '3' in the code below to vary the date format (e.g. ddwrt:FormatDate(@StartDate, 2057, 1) will display 30/03/2016.


Images

To add an image (from your own Picture field – in this case @PostImage)

<img border="0" src='{@PostImage}' alt='{@PostImage.desc}' title='{@PostImage.desc}'/>


To show nothing if your image field is blank.

<xsl:choose>

<xsl:when test="@PostImage != ''">

<img border="0" src='{@PostImage}' alt='{@PostImage.desc}' title='{@PostImage.desc}'/>

</xsl:when>

<xsl:otherwise>

</xsl:otherwise>

</xsl:choose>


To add a pdf icon

<div class="pdficon">

<a href='{$SafeLinkUrl}' title='{@LinkToolTip}' target="_blank">

<img src="/_layouts/15/images/icpdf.png?rev=36"></img>

</a>

</div>


HTML


Parse field as HTML

<xsl:value-of select="@Author" disable-output-escaping="yes" />


Set a div depending on output of field.


<xsl:if test="@Urgency = 'High' ">

<div class="High">

</div>

</xsl:if>


<xsl:if test="@Urgency = 'Low' ">

<div class="Low">

</div>

</xsl:if>


Read more

Office 365 Hosting Coming To Australia

  • Posted by: Hayden Sinclair

I was interested to read that Microsoft will be expanding their Windows Azure Service into Australia.

If Microsoft are creating data centres for Windows Azure it seems likely that they will offer Office 365 as well.

This could mean faster data transfer for customers in New Zealand, and may allay user data sovereignty fears.

The speed of Office 365 in New Zealand seems fine to me, it will be interesting to see if an Australian based service would be for my Auckland, New Zealand SharePoint clients. ​


Update March 2015: Australia have gone live with Office 365 hosting in Australia. "Existing Office 365 customers with services hosted in its Asia Pacific region in Singapore will be automatically moved to Australia unless they opt-out. Customers will be given six weeks advance notice of their move date, which will occur out of business hours."​

Read more

Auckland New Zealand Population with Excel Power View

  • Posted by: Hayden Sinclair

I have recently been analysing New Zealand Census data in Excel with Power Pivot, Power Map and Power View.


You can download the latest New Zealand Census Data in Excel and add the stats into your own Power Pivot, Power View and Power Map sheets.


To plot the statistics in Power Map, I downloaded each Meshblock’s co-ordinates from Koordinates.  I stripped out the Polygon co-ordinates and just used the first location point for each Meshblock.


Being, based in Auckland, New Zealand, I have concentrated on the Auckland dataset.


The Power Map video shows population growth by suburb (meshblock) between 1991 and 2007.  To Aucklanders it will be no surprise to see that the suburbs have grown progressively from Census to Census.


Not all cities are seeing their populations rise year on year.  Detriot for example has lost 25% of their residents in the last ten years.


Read more

How to initiate a reindexing of the search catalog in SharePoint Online

  • Posted by: Hayden Sinclair

The new Content Search Web Parts have arrived in SharePoint Online. Once you map your Managed Property or Refinable Strings in the admin section of SharePoint Online.

The SharePoint search engine will index you content in the next crawl to populate your refinable strings for you.

You can wait for the Search Engine to run a full crawl to see your work in action, or you could initiate a crawl yourself. If you have a SharePoint on-premise installation this is easy. You can either Reindex Your List or Start A Full Crawl within Central Administration.

Using the Reindex Your List method, does not speed things up in Office 365. You have to wait patiently for Microsoft to do a full crawl at their scheduled time whether you click that button or not (anecdotally you can wait up to a week for this crawl to happen).

I hate to wait, so one way to initiate the reindexing of your content for Office 365 is to update an item in your document library. Updating the item will trigger SharePoint Online’s Continuous Crawl function and within a few minutes your Refinable Strings and Integers will be populating your Content Search Web Part.

Updating each item in a list or library is tedious, so use the Reindex List button.  Open your list, click List Settings > Advanced Settings. 

Click the Reindex List button to reindex all of the content in your list during the next crawl.

If you are in a document library click Reindex Document Library

You will then be presented with a prompt, click Reindex List again.

The reindex method is not instantaneous, so be patient.  I have found the search index should be updated with your latest changes within about 20 minutes. 

Read more

SharePoint Public Websites with Office 365

  • Posted by: Hayden Sinclair
I have been asked by a few clients about the merits of using SharePoint as a public facing website.

If you are using SharePoint 2013 for your Intranet then my recommendation is to certainly use SharePoint 2013 for your public facing Internet site as well.

If you currently have a great looking website that works for you (is Number 1 in Google, looks great and is easy to update), you have no need to jump to SharePoint. If you are about to start an Internet refresh project and you are already using SharePoint internally, is indeed the way to go.

The biggest reason to choose a self-hosted version of SharePoint Server is that you can reuse your carefully collated Managed Metadata across both your Intranet and Internet sites. This will improve the search experience for both employees and external visitors alike.

External visitors will quickly find information they are after (as the content has been pre-tagged with search friendly metadata), while internal employees will be able to find content from your Public facing site within their (internal) Intranet searches.

An information sharing mindset, should be engrained within most organisations, but why not share as much information as possible with your customers as well.

My prediction is that over time more companies will host their (non-sensitive) product information repositories on their public facing sites, rather than intranets. Surfacing “Internal Only” sections on these pages can be accomplished with a Search-Driven web part, carefully pulling permission protected information to the page for employee eyes-only.

NOTE: Since I published this article Microsoft have announced they will discontinue the Public Website feature in 2017.

http://support.microsoft.com/kb/3027254
If you already have a SharePoint Public site you will have to make alternative arrangements before 2017.
Read more
×

Log in